So you got yourself a fancy new digital camera with umpteen bazillion megapixels, and you are ready to start showing your work on your website. Before you start uploading all those great duckface photos, you should spend a little time optimizing those images for the web.
If you remember dial-up internet, you’ll remember the agonizing wait as images appeared on your screen line-by-line; it could take 10 minutes or more for a large image to show up! Now that broadband internet access is the standard rather than the exception, file size of images is not the issue it used to be.
Most folks think that as long as they have the right file type, their images will display just fine. And for the most part, they will. WordPress does a great job of handling images, and takes most of the work out of inserting images into posts and pages. However, a little work on the front end to keep your image’s file size as small as possible while maintaining the image’s size and quality can make your website work better and faster.
We use Adobe Photoshop for our image manipulation, because it’s a tool we use for our jobs, and this post will focus on Photoshop techniques. However, you don’t have to spend the money for Photoshop to get the same results. Some well-reviewed image manipulation programs are available for free, including Irfanview, GIMP, and FastStone. Dynamic Drive has an online image optimizer which is also free, but is limited to files less than 300KB.
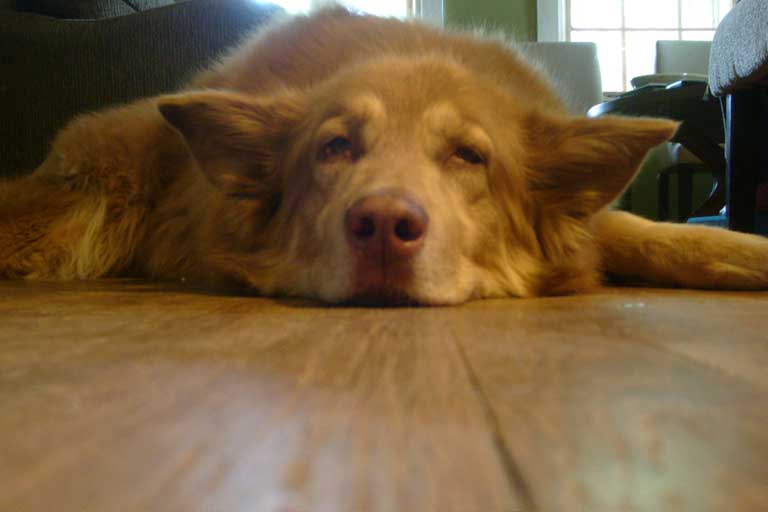
So how do you optimize your images? As I said previously, it’s all about file size. For example, let’s take a look at this image of our dog, Wookie.
I took this picture with a Samsung 7.2 megapixel digital camera. The file size, straight from the camera, is 2.73 megs, with dimensions of 3072 pixels wide by 2048 pixels tall. This will make a great photo print, but it is far too large for a standard web display. So let’s cut this image down to size.
The first thing I want to do is to open the image in Photoshop and make any changes to the image, such as cropping or color adjustments. Once I have those down pat, I want to change the actual pixel dimensions of the image.
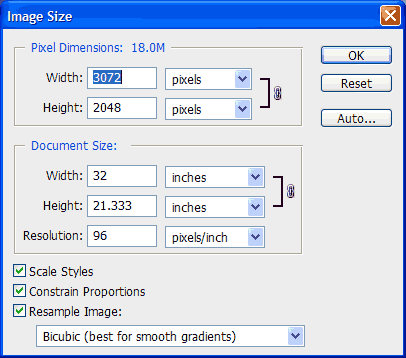
Go to the Image menu and select “Image Size” (or use the keyboard shortcut ALT + CTRL + I) to open the Image Size window. Here we can change the pixel dimensions, document size, and resolution of the image. Make certain that the “Constrain Proportions” box is checked so that the image scales correctly – you don’t want to change just one aspect of the image!
In this case, I changed the width pixel dimension to 768; the height changed automatically with it to 512 pixels. This is a much more manageable size for most web work.
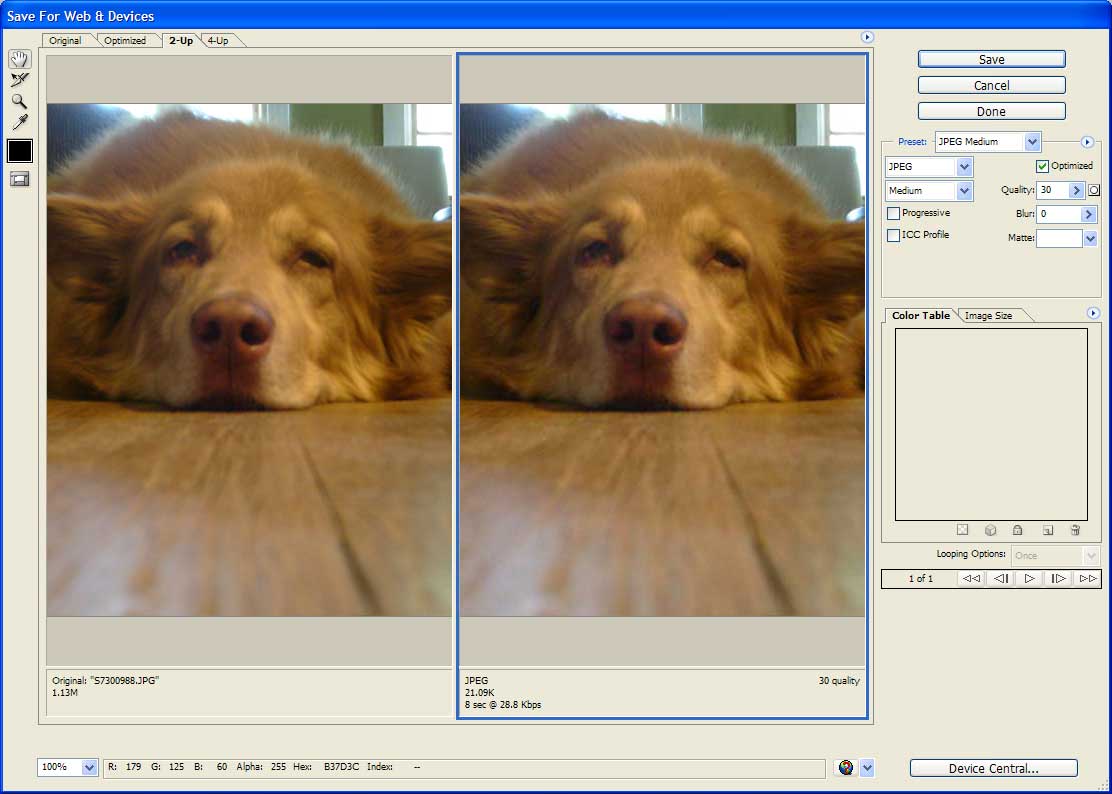
Now that I have the image at the size I want, it’s time to optimize the image. Photoshop has a great feature called “Save for web and devices” which will optimize your images for online viewing.
Either call the menu down from the “File” menu, or use the keyboard shortcut SHIFT + ALT + CTRL + S to call up the “Save for Web and Devices” menu.
Use the drop-down menu on the right to call up one of the presets for your image. I have found that in 90 percent of the images I work with, the “JPEG Medium” setting is the best for photographs. Of course, depending on the image with which you are working, a .png format (for images with transparent backgrounds) or .gif format (for simple, solid-color graphics) may help the most.
I really like the file size information shown in the window; it allows you to see just how much file space you are saving by optimizing the image. For example, my resized shot of Wooke, at 768 pixels wide, was still larger than 1 meg. By optimizing the file, I was able to keep the same pixel dimensions, at a very acceptable resolution, and get the file size down to just over 21 kilobytes.


